Creating Vista Terrains in Unity 2018 LW SRP with World Machine
by 900lbs of Creative
Nic Record
Environmental Artist
- nicholasrecord.com
The new release of Unity 2018 brought some awesome new features to the desk and we’ll be using
those today along with World Machine to set up some terrain. We’ll also be showing some set up with
the shader graph to bring your terrain to life in the VR Lightweight SRP. Since our studio deals heavily in
XR, this process seemed like a great place to start for some R&D.
We began by creating a whitebox of the environment in Maya where we could quickly iterate on possible vistas and play with scale. Once we were satisfied with the blockout, we took it into Zbrush to quickly sculpt a little bit more detail in shape and to correct the mesh density from pushing and pulling vertices in Maya. This would allow us to export the most accurate and well-suited height map for World Machine. The most important thing to remember is that you will ultimately be using a heightmap in the early stages, so any detail put into crevasses/concave areas will be lost. You would need to revisit that detail later.
Our preferred software for terrain generation is World Machine + GeoGlyph, which grants us access to some more powerful simulation algorithms and UX preference. Like most node-base software, your graph can quickly become superfluous and compounded. It’s important to return to the basics and focus on what needs to be achieved rather than adding extra little details. Unless your last stop is World Machine, there is no need to make it look “render perfect”. For this terrain, there were three goals to hit.
- Create a rocky, martian-esque land mass with plateau shapes
- Create a sea of sand dunes to exist in the negative space (that are more rocks than sand but tomato, tomato).
- Blend the two geological structures together.
Adding in those little details will still ultimately be lost. You can rely on substance materials to bring that back in. We will be utilizing this splat map produced from World Machine and tweaked in Photoshop, and the Unity shader graph to blend those substances together in a convincing way.
Of the nodes in the graph above, I’d have to say the MVP node is the Sandblast node, which although takes a little extra time to compute, offers great results for filling in and smoothing out the areas where mesh intersects.
The Lightweight SRP grants us access to the new shader graph. At its core, we created a layered material shader, but added specific features to achieve the results we wanted. You can use most of the same practices seen from Shader Forge, Amplify, UE4, etc. to create a layered material shader. Since Unity by default only allows 16 texture samples, using procedural noise and channel packing textures is the most optimal way to go in terms of performance. Here, the smoothness maps ended up packed into the alpha channel of the albedo maps and each layer’s AO ended up packed into one texture. Since the focus of our R&D project was primarily inside the dome, there was no need to be excessive with high polycount tessellation of the ground materials, so a simple noise did just fine for some vertex offset.
One obstacle encountered was how to supply the terrain with a different scale of ground rocks throughout the distance. Having a consistent tiling substance simply would not do. Tile it too small and you would be able to see the noisy tiling off the distance. Tile it too big and the pixel resolution of the rocks nearest the player suffers. We wanted to avoid using two or more different textures to solve this. If you think about it, simply adding one new material layer adds at least two extra texture samples when the albedo, normal, smoothness, and AO are accounted for. The solution was to create a material function that would dither the UV’s out from the designated players location. A dither was necessary because if you simply try to interpolate two different radial values, that information gets interpreted as UV distortion rather than a change in UV scale.
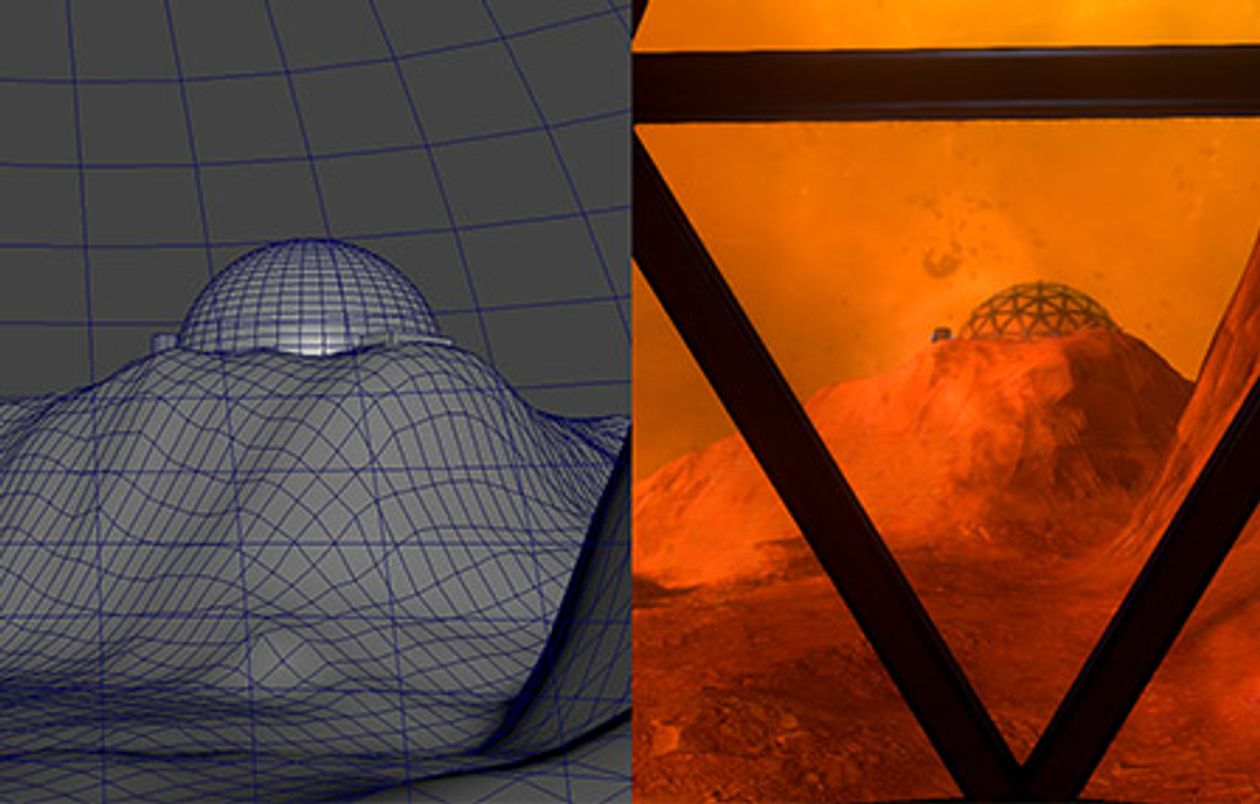
At times, finicky results would be produced from normal maps very specific to how they were blended or compressed that you wouldn’t expect to see from other shader editors. The transparency rendering is also rather simple, so a bit of manual compensation with lighting and post processing was required for how the terrain would look from inside of the dome through the glass. Those two pain points aside, we were very pleased with the fidelity possible in the lightweight SRP and greatly look forward to more improvements from Unity that can escalate our VR applications to a new level.